

Most homeowners don’t think about expansion joints until something goes wrong. By then, water has already worked its way in, weeds are pushing through the gaps, and what started as routine maintenance has turned into a repair conversation.
Expansion joints are one of the most important and most overlooked parts of a concrete driveway. Understanding what they do and how to care for them is the difference between a driveway that lasts 30 years and one that starts showing serious problems at 10.
What Are Expansion Joints?
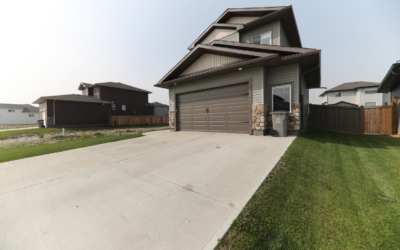
Expansion joints are intentional gaps cut or placed into your concrete driveway during installation. They run between slabs, along the edge where the driveway meets the garage, and sometimes along the sides where concrete meets another surface.
They exist for one reason: concrete moves. Oklahoma’s climate swings from triple-digit summer heat to hard freezes in winter, and concrete expands and contracts with every temperature change. Without somewhere for that movement to go, the slab has no choice but to crack — usually in the worst possible place.
Expansion joints give the concrete a controlled place to move. They absorb that stress and direct it away from the slab itself, which is why a properly jointed driveway stays intact while an unjointed one develops random cracking that’s expensive to repair.
Control Joints vs. Expansion Joints: What’s the Difference?
These two terms get used interchangeably but they’re not the same thing.
Control joints are shallow cuts made into the surface of a slab, usually about a quarter of the slab’s depth. They create a weak point that encourages the concrete to crack in a straight, predictable line if it does crack — keeping that crack hidden in the joint rather than running across the visible surface.
Expansion joints go all the way through the slab and are filled with a flexible material, usually a foam backer rod and a sealant or a pre-formed fiber board. They’re designed to physically compress and expand as the concrete moves, fully separating one section from another.
Both are part of a well-installed driveway. Both require maintenance over time.
Why Expansion Joint Maintenance Gets Neglected
The filler material in expansion joints doesn’t last forever. Sealants crack, harden, and pull away from the edges over time. Pre-formed fiber board compresses and breaks down. Once the joint is no longer doing its job, the gap becomes an entry point for everything you don’t want in your driveway: water, debris, weeds, and in Oklahoma winters, ice.
Water is the biggest threat. When it gets into an open joint and freezes, it expands — and that expansion puts direct pressure on the edges of your concrete slabs. Do that enough times over enough winters and you’ll start seeing spalling and cracking at the joint edges, which spreads from there.
The good news is that maintaining expansion joints is inexpensive and straightforward if you stay ahead of it. The bad news is that most homeowners don’t realize there’s a problem until it’s already caused damage.
How to Inspect Your Expansion Joints
Once a year — late fall before the first freeze is ideal in Tulsa — walk your driveway and look at each joint closely. You’re checking for four things:
Sealant condition. Is the sealant still flexible and adhered to both sides of the joint? If it’s cracked, crumbling, pulling away from the edges, or missing entirely, it needs to be replaced.
Joint depth. Can you see down into the gap? If the filler material has compressed or deteriorated, water can pool at the bottom of the joint instead of draining away.
Weed and debris intrusion. Weeds growing out of a joint are a sign the gap has been open long enough for soil and organic material to accumulate. That material holds moisture against the concrete and accelerates deterioration.
Edge condition. Look at the concrete on either side of the joint. Chipping, spalling, or small cracks radiating out from the joint edges are signs that water has already been getting in and freeze-thaw damage has begun.
How to Reseal an Expansion Joint
If the joint is in otherwise good condition but the sealant has failed, resealing it is a manageable DIY project. Here’s the process:
Clean the joint thoroughly first. Remove any old sealant, debris, weeds, and dirt. A wire brush, a flat screwdriver, and a shop vacuum work well for this. The joint needs to be completely clean and dry before any new material goes in.
If the joint is deeper than half an inch, install a foam backer rod first. This is a closed-cell foam rope that you press into the joint to give the sealant something to bond against and to control the depth of the sealant layer. It also prevents the sealant from bonding at the bottom of the joint, which would restrict its ability to flex.
Apply a self-leveling polyurethane or silicone concrete joint sealant. Polyurethane is generally preferred for driveways because it bonds strongly, stays flexible over a wide temperature range, and handles the traffic and UV exposure a driveway sees. Follow the manufacturer’s instructions for tooling and cure time before allowing traffic on the joint.
When to Call a Contractor
Resealing is a maintenance task. What’s beyond maintenance is when the joint itself has failed structurally — when the concrete edges are crumbling, when a slab has heaved or settled on one side of the joint, or when cracking has spread beyond the joint into the slab. Those are repair or replacement conversations, not a tube of sealant.
If you’re seeing any of that at your joints, the sooner you have someone look at it the better. Damage that starts at a joint edge almost always spreads, and catching it early is significantly less expensive than addressing it after a full Oklahoma winter has worked on it.
The Bottom Line
Expansion joints are doing an important job every time the temperature changes, which in Tulsa means they’re working constantly. A few minutes of inspection once a year and a tube of sealant every few years is a small investment compared to what deferred maintenance on those joints can cost you in repairs down the road.
If you’re not sure what condition your joints are in or you’re already seeing cracking near the edges, contact us. Our team will take a look and give you an honest assessment of what needs to be done.

Maintenance for Long-Term Performance
Maintaining your concrete helps extend its lifespan significantly. Regular cleaning, sealing, and early crack repair prevent small issues from becoming major problems.
Avoid using harsh chemicals or de-icing salts, especially in the first year after installation.
Return on Investment
Concrete improvements enhance curb appeal, improve usability, and add long-term value to your property. They also require less maintenance than many alternative materials.
Choosing the Right Contractor in Bixby
Selecting a contractor with local experience is essential. Look for proper licensing, insurance, strong references, and clear communication.
Avoid unusually low bids, as they often indicate shortcuts in materials or installation.
Start Your Bixby Concrete Project Today
Tulsa Driveways provides high-quality concrete services throughout Bixby and surrounding areas.
We would love to help you get started with a free consultation. Schedule an appointment now.